Here in the Indianapolis Metro Area, winter is very much knocking on the door. And that means the potential for blizzards, ice storms, and, less dramatically but no less impactfully, incursions of deep, even bone-chilling, cold.
It’s that wintertime cold that can do a real number to plumbing, with subfreezing spells introducing the real potential for frozen pipes and significant, even disastrous, water leaks. Indoor lines are fairly easy to protect, though pipes in unheated spots such as crawl spaces are vulnerable. But outdoor spigots, hoses, sprinkler systems, and other irrigation setups need proper winterizing to avoid such seasonal headaches. You may not realize their consequences until you get your yard watering systems going in the spring.
At Hope Plumbing, Heating and Cooling, we’re here for you in the event of a burst or leaking pipe or other outdoor plumbing catastrophe. We’re experts in the proper installation of lawn irrigation, which can help you avoid winter problems. But there are steps you can take on your own to minimize the chance of sneaky leaks or ruined equipment.
The Importance of Winterizing Outdoor Plumbing & Irrigation
It’s not common knowledge why water can be such an issue in plumbing systems when the temperatures drop. The reason has to do with one of the striking, fundamental characteristics of H20: It expands upon freezing and exists at a lower density in its solid phase, ice, than as a liquid.
Along with ensuring that ice floats, this means that it occupies more space than liquid water of the same volume. Subject to below-freezing temperatures, the water filling a pipe or irrigation line will, turning to ice, push against that conduit. This places strain on it, potentially cracking or even bursting it. Needless to say, freeze expansion and pressure can negatively affect not only pipes and tubes but also valves, pumps, sprinkler heads, and various fittings.
Here in the Indianapolis area, we typically experience our first freeze of the fall in the last week or so of October, while a harder freeze, with temperatures dropping to 28 degrees Fahrenheit or below, typically hits in the first 10 days of November. It’s always a bit of a dance come autumn, balancing the convenience of having outside water available against the threat of freezing temperatures. But it’s always better safe than sorry. Watch that weather forecast, and don’t let yourself be caught off-guard by an early subzero night.
Winterizing Outdoor Faucets and Dealing With Hoses
There are two basic steps to winterizing an outdoor faucet or spigot. You need to shut off its water supply, and then, as an extra safeguard, shield the spigot itself with a protective cover. This doesn’t apply to frost-free or frost-proof yard hydrants, which are designed to function in the cold.
Cut the water to the outside faucet by closing the indoor shutoff valve. This will either be an old-fashioned gate valve with a wheel-style handle or a lever-controlled ball valve. Turn either type clockwise, twisting a gate valve closed or pulling the lever of a ball valve a quarter-turn, to kill the water supply to the outside.
If your hose is hooked up to your outside spigot, detach it, and then drain it by hanging it with ends down or lifting it to waist height and pulling the hose hand over hand. Spool up the hose and store it, ideally in a temperature-controlled environment to ward against cracking and brittleness. It’s also wise to overwinter your watering wands, nozzles, and irrigation timers, in a storage space protected from freezing temperatures.
Then you’ll need to open the outdoor spigot and give it time to drain, so residual water left inside the supply line after the indoor shutoff valve closes won’t freeze.
You can then leave the spigot slightly opened to let any ice that might result from leftover water to expand and relieve pressure. Or you can close the spigot, so as to keep cold air from seeping into the supply pipe. Which is better is a matter up for debate. But it will be a moot point if you install a faucet cover to insulate it your outdoor spigot and its interior piping. Rigid foam covers (sometimes sheathed in plastic) can be cinched tight over a standard spigot coming from an exterior wall. A fabric faucet cover will work better for a spigot of nonstandard configuration or free-standing design.
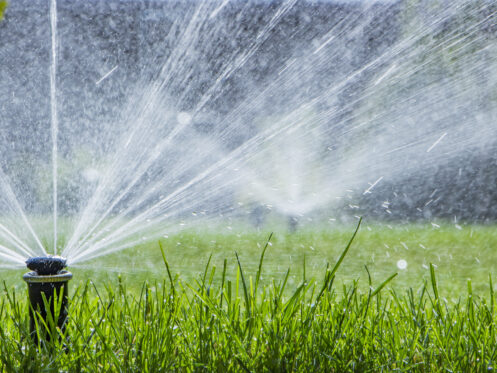
Winterizing an Outdoor Sprinkler System
If you have an in-ground sprinkler system, you’ll need to winterize it ahead of subfreezing temperatures. The main supply pipes for the system may or may not be installed below the frost line. In our corner of Central Indiana, that’s roughly 54 inches deep. Either way, the sprinkler arms and components like sprinkler heads and backflow preventers are at risk of damage from ice formation.
Depending on your sprinkler setup, you may have manual or automatic drain valves. You open the manual drain valves at the low points of the system to allow water to flow out. Automatic drain valves open on their own when the water supply to the system shuts off. Manual and automatic drain valves are convenient but not necessarily foolproof. To be certain that your system is flushed of water, you can blow it out using compressed air.
Blowing Out a Sprinkler System
You should follow any and all manufacturer directions for draining your particular sprinkler system. The following procedure is a general overview only. If you don’t feel comfortable blowing out your own system, get in touch with Hope Plumbing, and we’ll take care of it.
The blowing-out process requires a meticulous approach and careful monitoring. Compressed air can damage your sprinkler system if you’re not careful. Be sure to calibrate the air pressure to the equipment in your system. The general range is 40 to 80 pounds per square inch (psi), but don’t exceed 50 psi if your sprinkler system incorporates flexible polyethylene piping.
To blow out your sprinkler system, first turn off the water supply via the shutoff valve. You may find it in your basement or crawl space or in an outdoor valve box near your water meter. You also need to close the valve “downstream” of the backflow. This will prevent damage to Pressure Vacuum Breaker (PVB) and Reduced Pressure (RP) units from compressed air. You’ll adjust those backflow-preventer valves later in the winterization process.
Connect your compressor to the sprinkler system’s blowout fitting. Then set your control module to one of your irrigation zones, and turn on the compressor to begin purging the system. Once a zone is blown out, shift to another; you don’t want compressed air running through dry lines.
Preparing Your Backflow Device for Winter
Drain your backflow preventer, leaving the valves and test cocks partly open. This allows for ice expansion from residual water over the winter without damage. Wrap both the supply and outlet sides in foam insulation secured with pipe wrap or duct tape, and bundle the backflow device with insulation and tape.
We’re Here to Help This Winter
Indianapolis-area winters can be nasty. If you aren’t careful, their effects on your outdoor plumbing may only rear their ugly head come spring. For inspecting your irrigation system ahead of deep freezes or repairing frost-broken lines, valves, heads, and other components, trust our team at Hope Plumbing, Heating and Cooling. If you end up with frozen or burst pipes indoors, we can come to your rescue on that front, too!
Give us a call at (317) 807-6348 or drop Hope Plumbing, Heating and Cooling a line via our website for any and all plumbing needs in the greater Indianapolis, IN area!